Home Assistant
A dryer with a Link module publishes itself to Home Assistant via MQTT Discovery: HA creates the entities on its own — chamber readings, drying and storage start fields, buttons. The portal is not needed for this, everything goes through your MQTT broker.
Below: enabling the integration, verification and a ready-made card layout, so that the device looks like the picture rather than a list of entities.
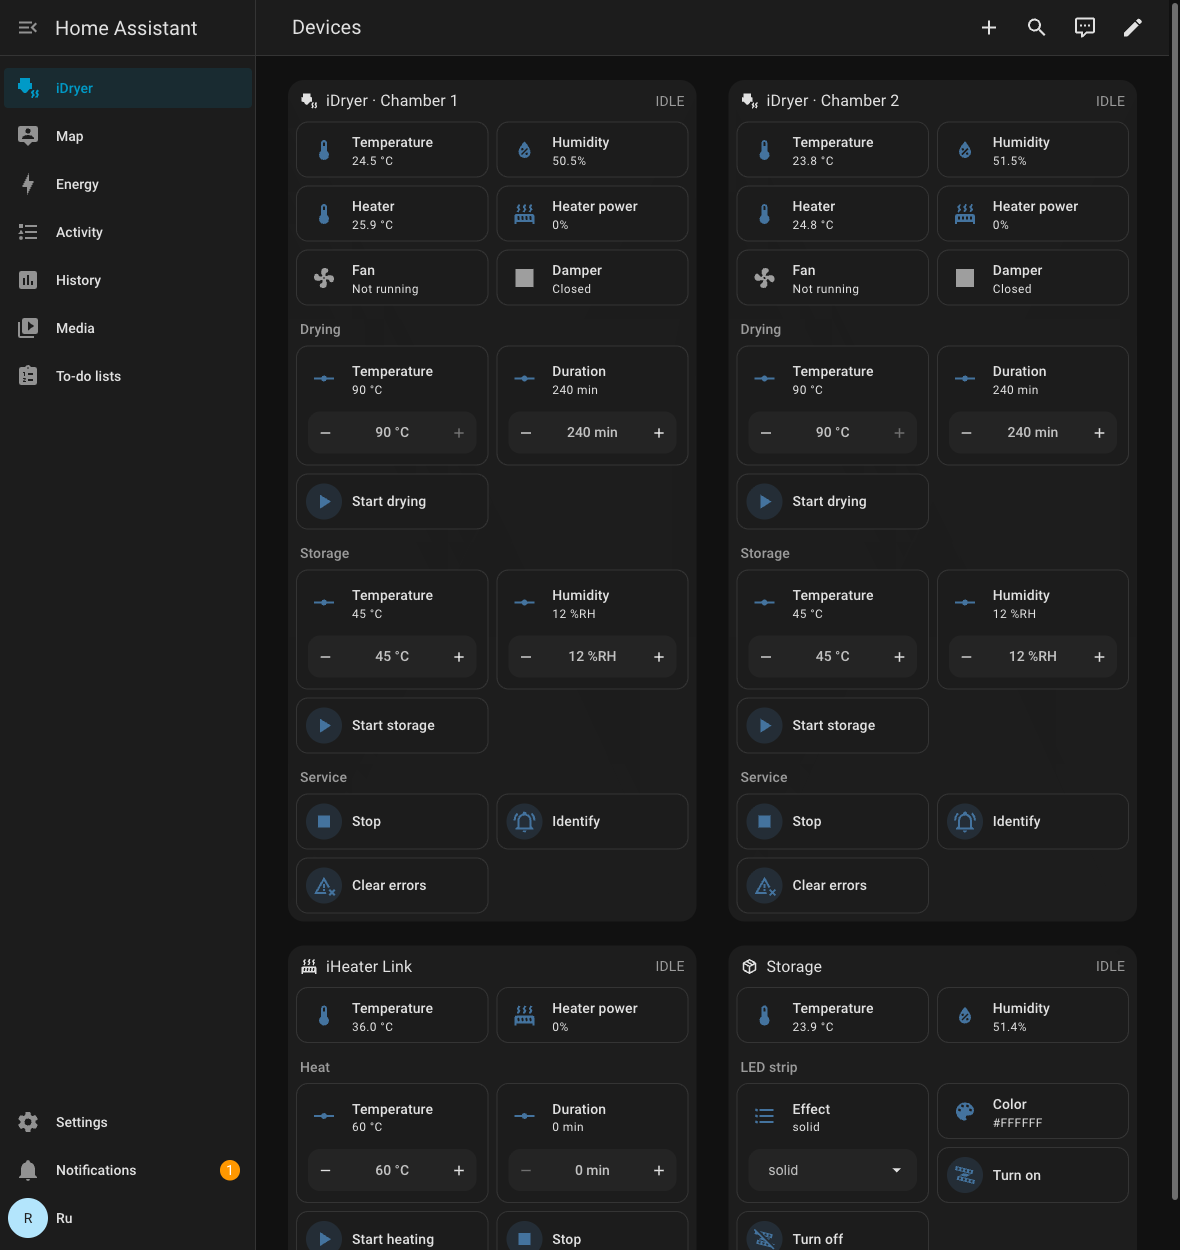 Both dryer chambers on the Home Assistant panel: readings, drying and storage start, service.
Note
The device will not appear in Settings → Devices & services → Discovered: this is MQTT Discovery, not UPnP/zeroconf. The MQTT integration in Home Assistant must be added in advance.
What you need
- An MQTT broker: the Mosquitto broker add-on in Home Assistant or any broker on your network.
- The MQTT integration added in Home Assistant, pointing to that broker.
- A dryer with a Link module on the network and
Onlineon the portal.
Step 1. Enable the integration on the device
Open the device at portal.idryer.org and find the Integrations → Home Assistant block.
| Field | What to enter |
|---|---|
| Host | the broker address on your network, for example 192.168.1.27 |
| Port | the broker port, usually 1883 |
| Username / Password | broker credentials, if it requires them |
| Discovery prefix | homeassistant, unless you changed it in the HA settings |
| Enabled | the checkbox — otherwise the device will not connect to the broker |
The settings go straight to the device over the local network — the portal does not store them.
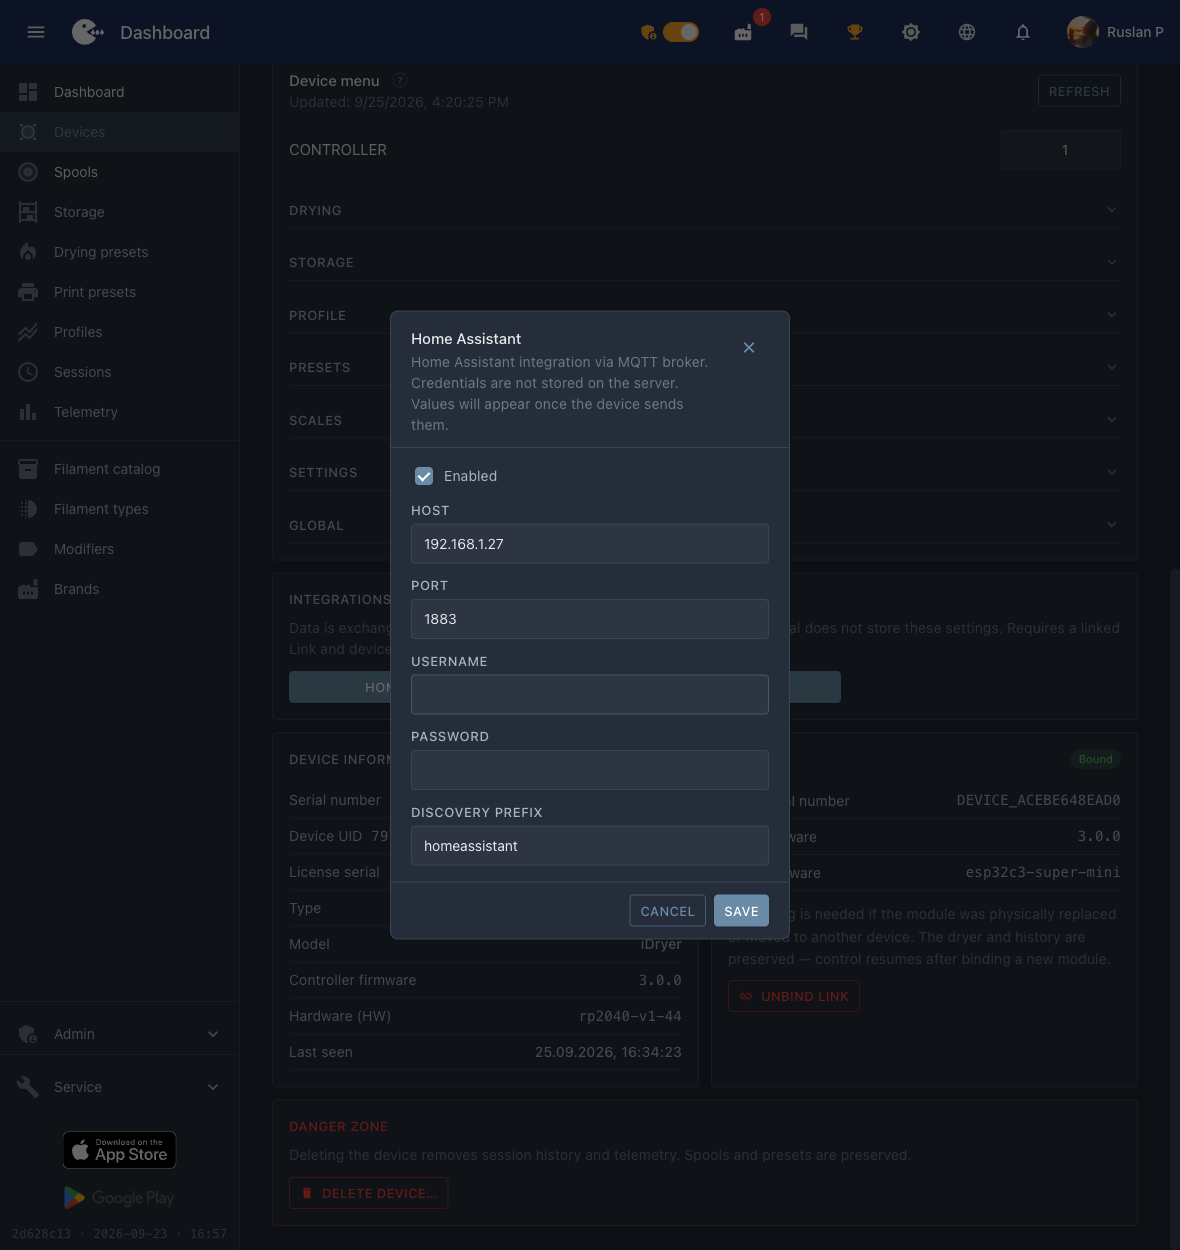 The broker address, port and the "Enabled" flag — everything the device needs.
Step 2. Find the device in Home Assistant
Settings → Devices & services → the MQTT card → in the Services section expand the broker node. iDryer devices are listed under serial numbers of the form DEVICE_*.
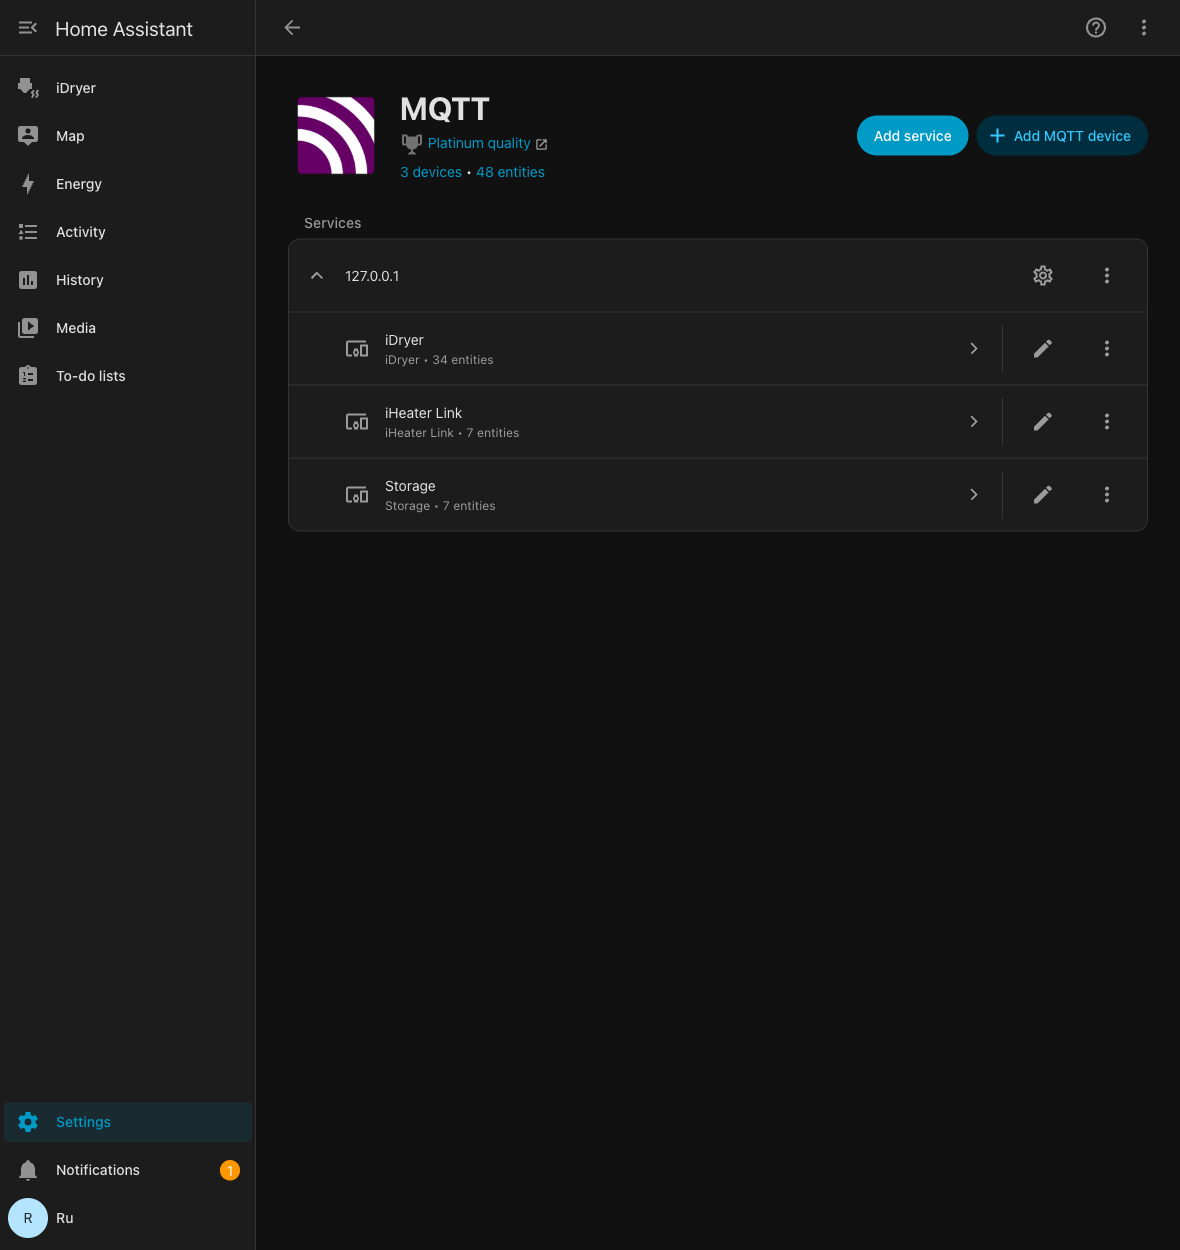 Devices under the broker node; the dryer shows its entity count.
Open the device: HA already shows the readings and controls. Check that the values are live — they update together with the device telemetry.
Step 3. Build the card
HA lays the entities out on its own, and the result is a long list. The ready-made layout groups them the same way as in the app: readings on top, then Drying, Storage and Service.
Settings→Dashboards→ Add dashboard → an empty dashboard, open it.- Top right corner → the pencil (Edit) → the "⋮" menu → Raw configuration editor.
- Paste the contents below and save.
The layout is designed for a dashboard of type sections.
title: iDryer
views:
- title: Devices
  path: devices
  type: sections
  max_columns: 4
  sections:
  - type: grid
    background: true
    cards:
    - type: heading
      heading: iDryer · Chamber 1
      heading_style: title
      icon: mdi:printer-3d-nozzle-heat
      badges:
      - type: entity
        entity: sensor.idryer_u1_mode
        show_icon: false
        show_state: true
        color: primary
    - type: tile
      entity: sensor.idryer_u1_temperature
      name: Temperature
    - type: tile
      entity: sensor.idryer_u1_humidity
      name: Humidity
    - type: tile
      entity: sensor.idryer_u1_heater_temperature
      name: Heater
    - type: tile
      entity: sensor.idryer_u1_heater_power
      name: Heater power
    - type: tile
      entity: binary_sensor.idryer_u1_fan
      name: Fan
    - type: tile
      entity: binary_sensor.idryer_u1_damper
      name: Damper
    - type: tile
      entity: sensor.idryer_u1_weight
      name: Spool weight
      visibility:
      - condition: state
        entity: sensor.idryer_u1_weight
        state_not:
        - unknown
        - unavailable
    - type: heading
      heading: Drying
      heading_style: subtitle
    - type: tile
      entity: number.idryer_u1_drying_temperature
      name: Temperature
      features:
      - type: numeric-input
        style: buttons
      features_position: bottom
    - type: tile
      entity: number.idryer_u1_drying_duration
      name: Duration
      features:
      - type: numeric-input
        style: buttons
      features_position: bottom
    - type: tile
      entity: button.idryer_u1_drying
      name: Start drying
      icon: mdi:play
      hide_state: true
      tap_action: &id001
        action: perform-action
        perform_action: button.press
        target:
          entity_id: button.idryer_u1_drying
      icon_tap_action: *id001
    - type: heading
      heading: Storage
      heading_style: subtitle
    - type: tile
      entity: number.idryer_u1_storage_temperature
      name: Temperature
      features:
      - type: numeric-input
        style: buttons
      features_position: bottom
    - type: tile
      entity: number.idryer_u1_storage_humidity
      name: Humidity
      features:
      - type: numeric-input
        style: buttons
      features_position: bottom
    - type: tile
      entity: button.idryer_u1_storage
      name: Start storage
      icon: mdi:play
      hide_state: true
      tap_action: &id002
        action: perform-action
        perform_action: button.press
        target:
          entity_id: button.idryer_u1_storage
      icon_tap_action: *id002
    - type: heading
      heading: Service
      heading_style: subtitle
    - type: tile
      entity: button.idryer_u1_stop
      name: Stop
      icon: mdi:stop
      hide_state: true
      tap_action: &id003
        action: perform-action
        perform_action: button.press
        target:
          entity_id: button.idryer_u1_stop
      icon_tap_action: *id003
    - type: tile
      entity: button.idryer_u1_identify
      name: Identify
      icon: mdi:bell-ring-outline
      hide_state: true
      tap_action: &id004
        action: perform-action
        perform_action: button.press
        target:
          entity_id: button.idryer_u1_identify
      icon_tap_action: *id004
    - type: tile
      entity: button.idryer_u1_clear_errors
      name: Clear errors
      icon: mdi:alert-remove-outline
      hide_state: true
      tap_action: &id005
        action: perform-action
        perform_action: button.press
        target:
          entity_id: button.idryer_u1_clear_errors
      icon_tap_action: *id005
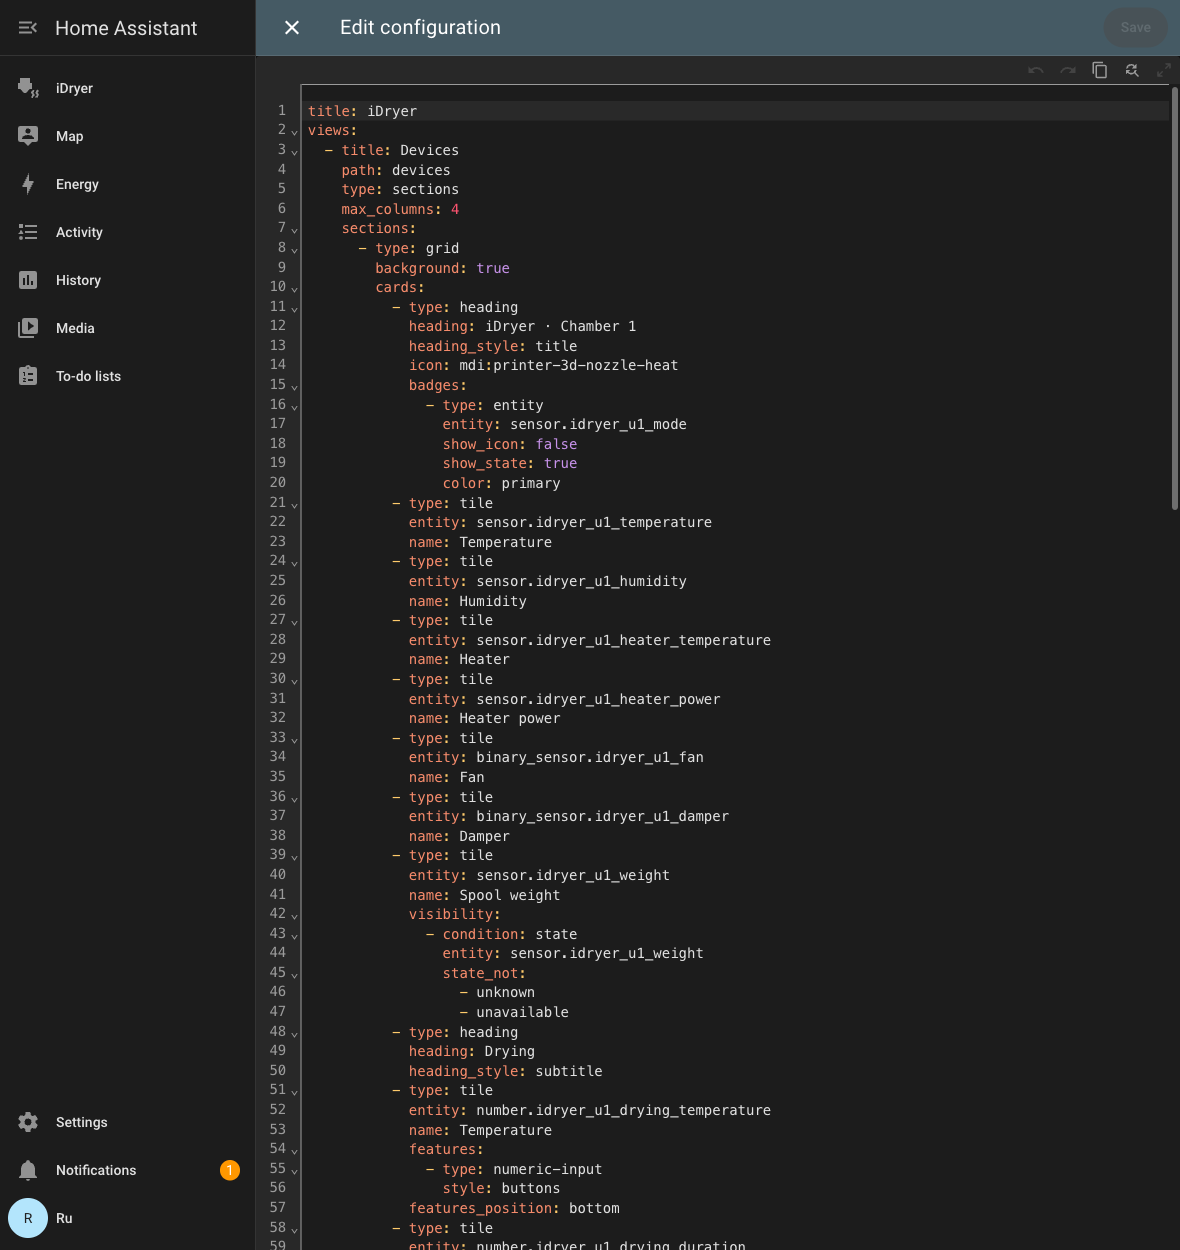 The same layout in the dashboard configuration editor.
The second chamber
On a two-chamber dryer the entities of the second chamber are named the same way, but with u2: sensor.idryer_u2_temperature, button.idryer_u2_drying and so on. Copy the whole - type: grid block, paste it after the first one and replace u1 with u2 in it, and the heading with iDryer · Chamber 2. You get two columns side by side.
If the entity names do not match
The layout is designed for standard identifiers of the form sensor.idryer_u1_temperature. If the card shows "Entity not found", look up your own: Settings → Devices & services → MQTT → your device → the entity list — and replace the prefix in the layout with yours.
Troubleshooting
| Symptom | What to check |
|---|---|
| The device did not appear in HA | On the portal the Home Assistant integration has the "Enabled" checkbox set, the broker address and port are correct. The device must be Online. |
It appeared, but the values are Unknown |
Wait for a telemetry cycle. If it is still empty — the broker does not keep retained messages or the device did not connect to it. |
| The buttons do not work | Check that the broker allows publishing to the idryer/# topics and that the device log has no authorization errors. |
Ghost entities with the value Unknown |
Retained messages from an earlier firmware are left over. Clear them: mosquitto_pub -h <broker> -t 'homeassistant/<...>/config' -n -r. |