Klipper: Firmware Installation
This page describes installing Klipper firmware on the iDryer Unit controller.
Flashing is done in two steps:
- Install the Katapult bootloader — allows re-flashing Klipper via USB without entering BOOT mode.
- Install Klipper via Katapult.
Requirements
- Host with Klipper installed (Raspberry Pi or equivalent).
- Data transfer USB cable.
- SSH access to the host terminal.
Part 1: Installing Katapult
1. Prepare the environment
Make sure the system is up to date and install dependencies:
sudo apt update
sudo apt install git build-essential gcc-arm-none-eabi libnewlib-arm-none-eabi \
  libstdc++-arm-none-eabi-newlib cmake python3 python3-pip python3-serial \
  usbutils dfu-util
2. Clone Katapult
3. Build configuration
Select parameters according to the screenshot:
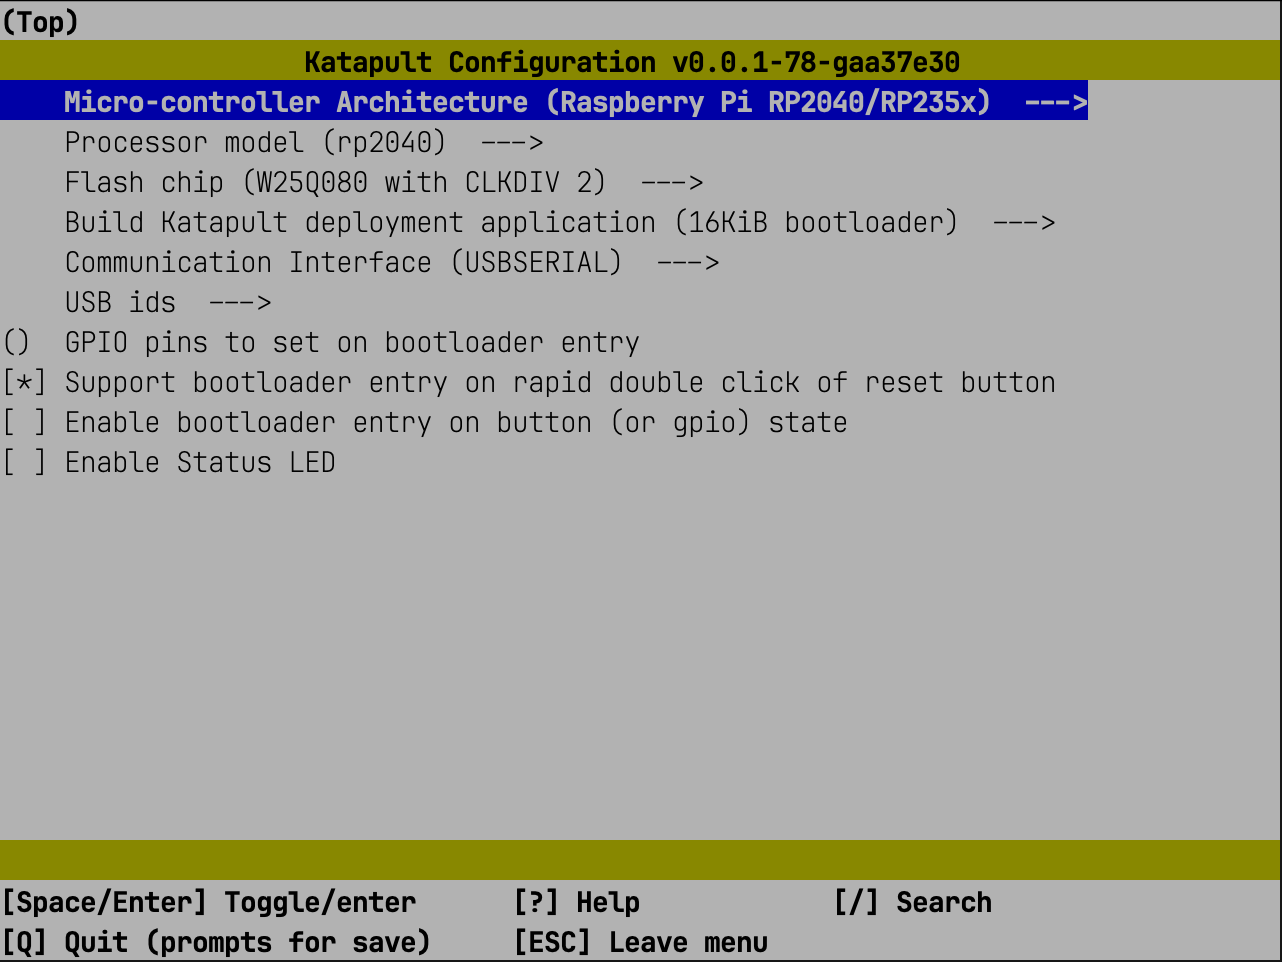
Important
Make sure the configuration is correct. Overwriting the bootloader with an incorrect build will render the device non-functional — a programmer will be required for recovery.
4. Build
5. Put the controller into BOOT mode
Do one of the following:
- With USB disconnected, hold
BOOT, connect USB, releaseBOOT. - Hold
BOOT, briefly pressRESET, releaseBOOT.
6. Find the controller USB ID
The output will contain a line like:
7. Flash Katapult
Part 2: Installing Klipper
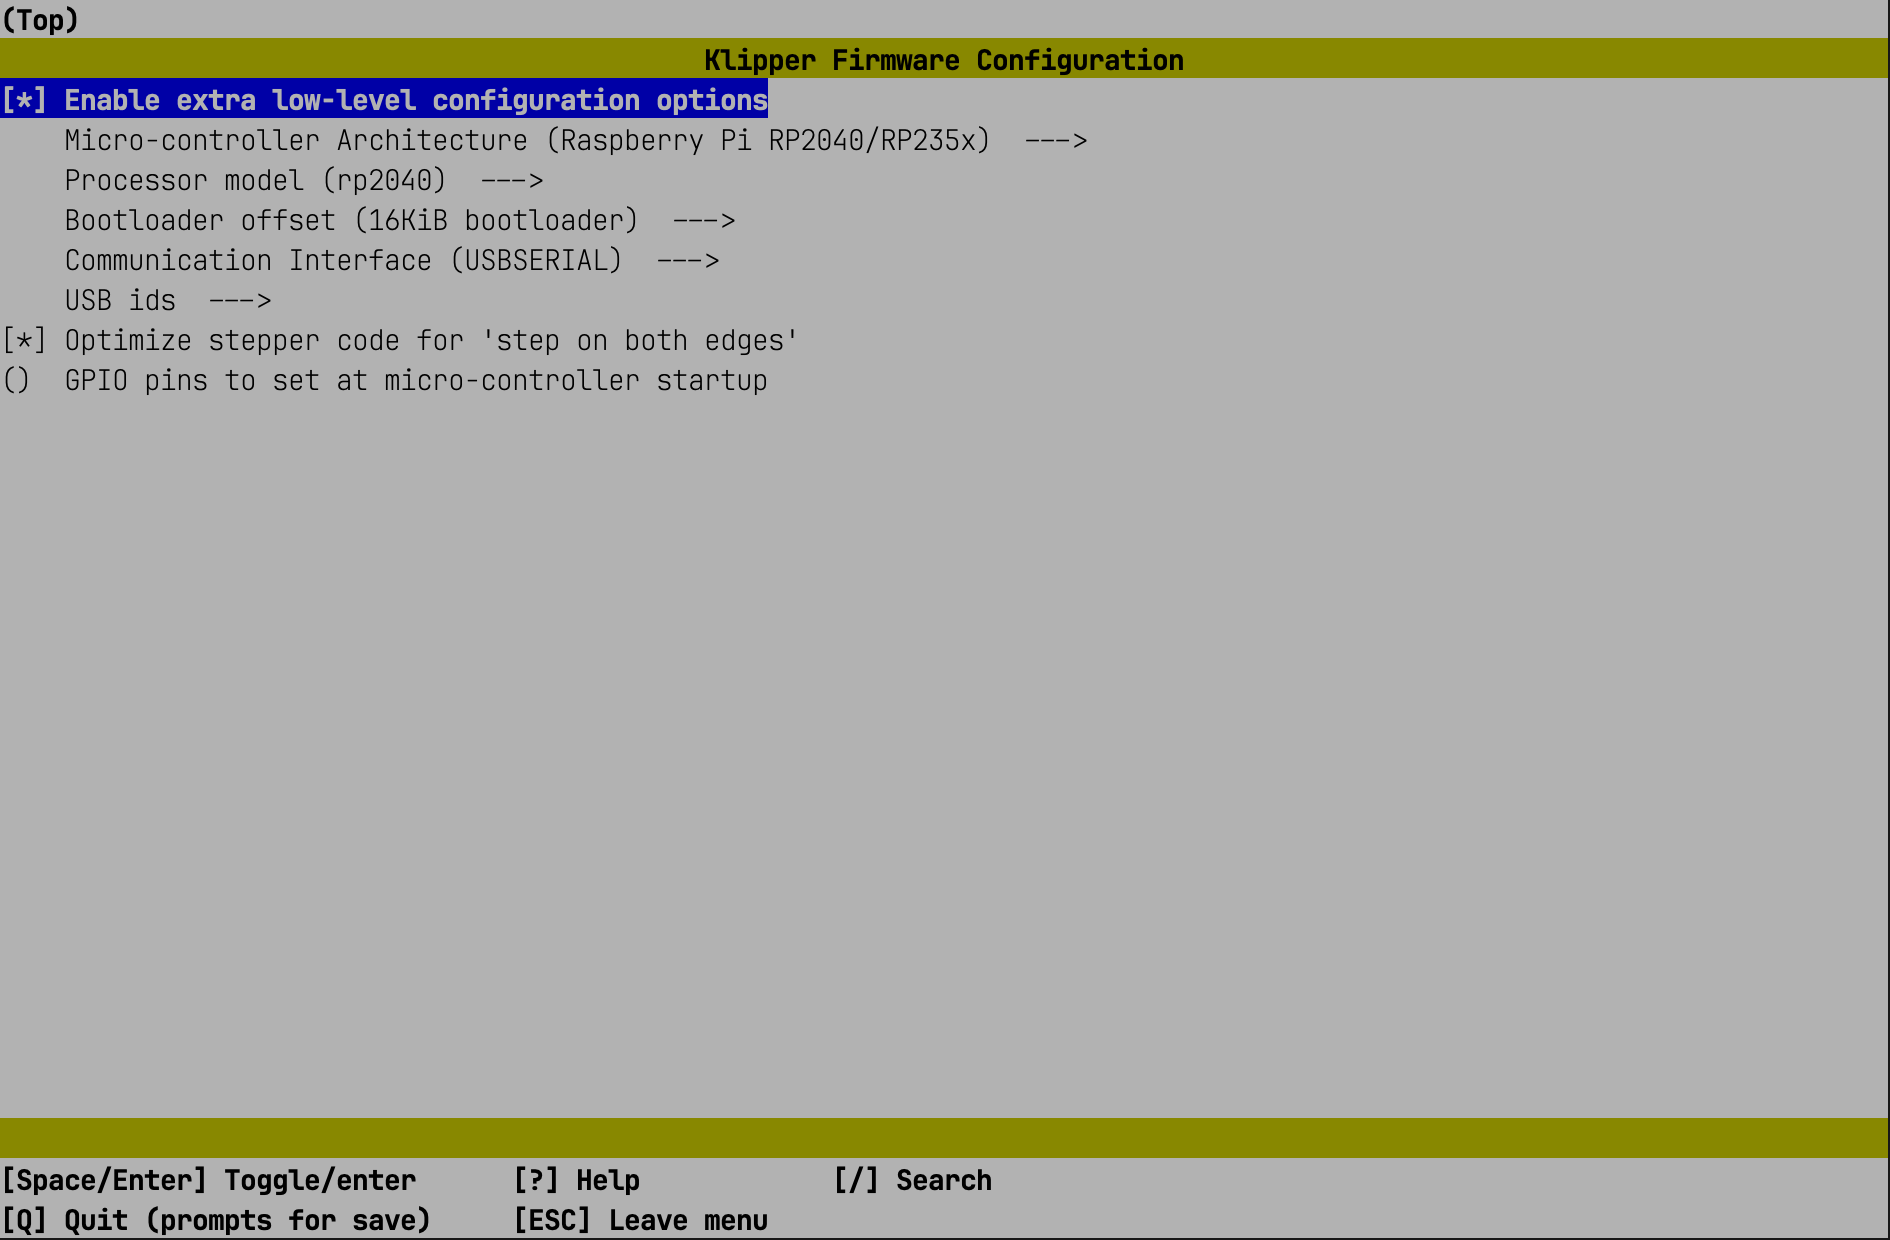
8. Configure Klipper build
Select parameters according to the screenshot:
9. Build Klipper
10. Install the Python library
11. Find the serial ID
Reconnect USB or press RESET, wait for the device to appear:
Expected output:
12. Flash Klipper via Katapult
cd ~/katapult/scripts
python3 flashtool.py -d /dev/serial/by-id/usb-katapult_rp2040_XXXXXXXXXXXXXXXX-XXXX
13. Verify the result
On success, the device ID will contain Klipper:
Next step
Install iDryer configuration files → User guide